Project Creation
This page guides you through the full process of creating a new project in Match Data Pro. Watch the tutorial video and follow detailed, step-by-step instructions to learn how to name your project, add modules, configure automation settings, and manage project-level options. With screenshots and clear explanations, you’ll be ready to launch and manage data projects with confidence.
Page Contents
✅ Accessing the Projects Page
-
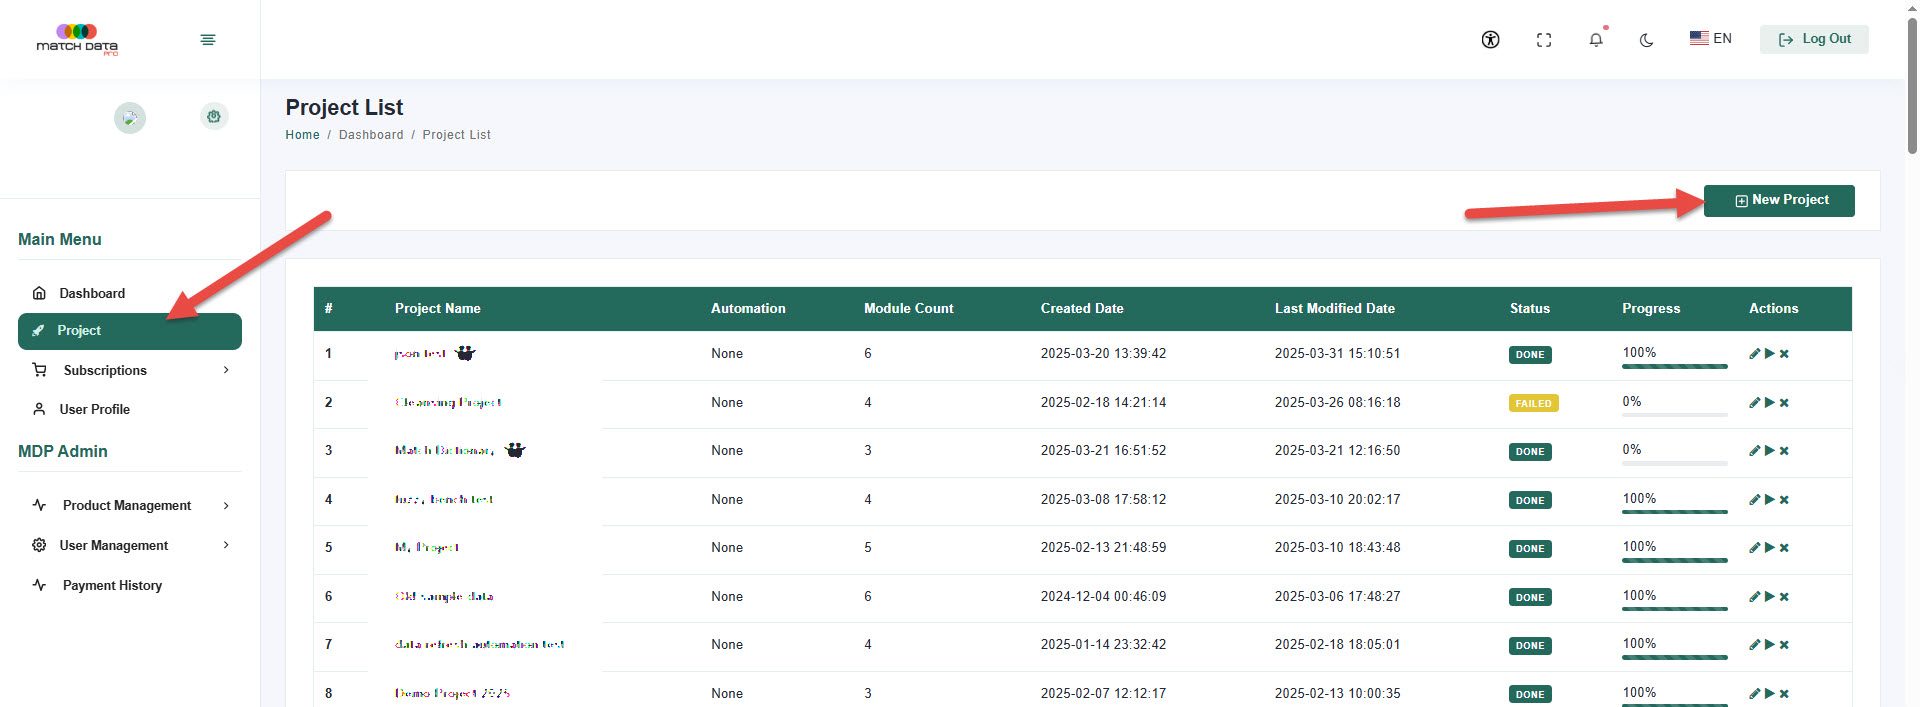
Click on the Projects tab in the left-hand navigation menu.
-
You’ll be taken to your Project List page, where you’ll see all previously created projects.
-
Each project row shows:
-
- Project name
- Number of modules used
- Automation status (if enabled)
- Created and last modified dates
ℹ️ Tip: Projects are automatically sorted by most recently accessed, so your latest project is always at the top.
➕ Creating a New Project
-
Click the Add New Project button in the top right.
-
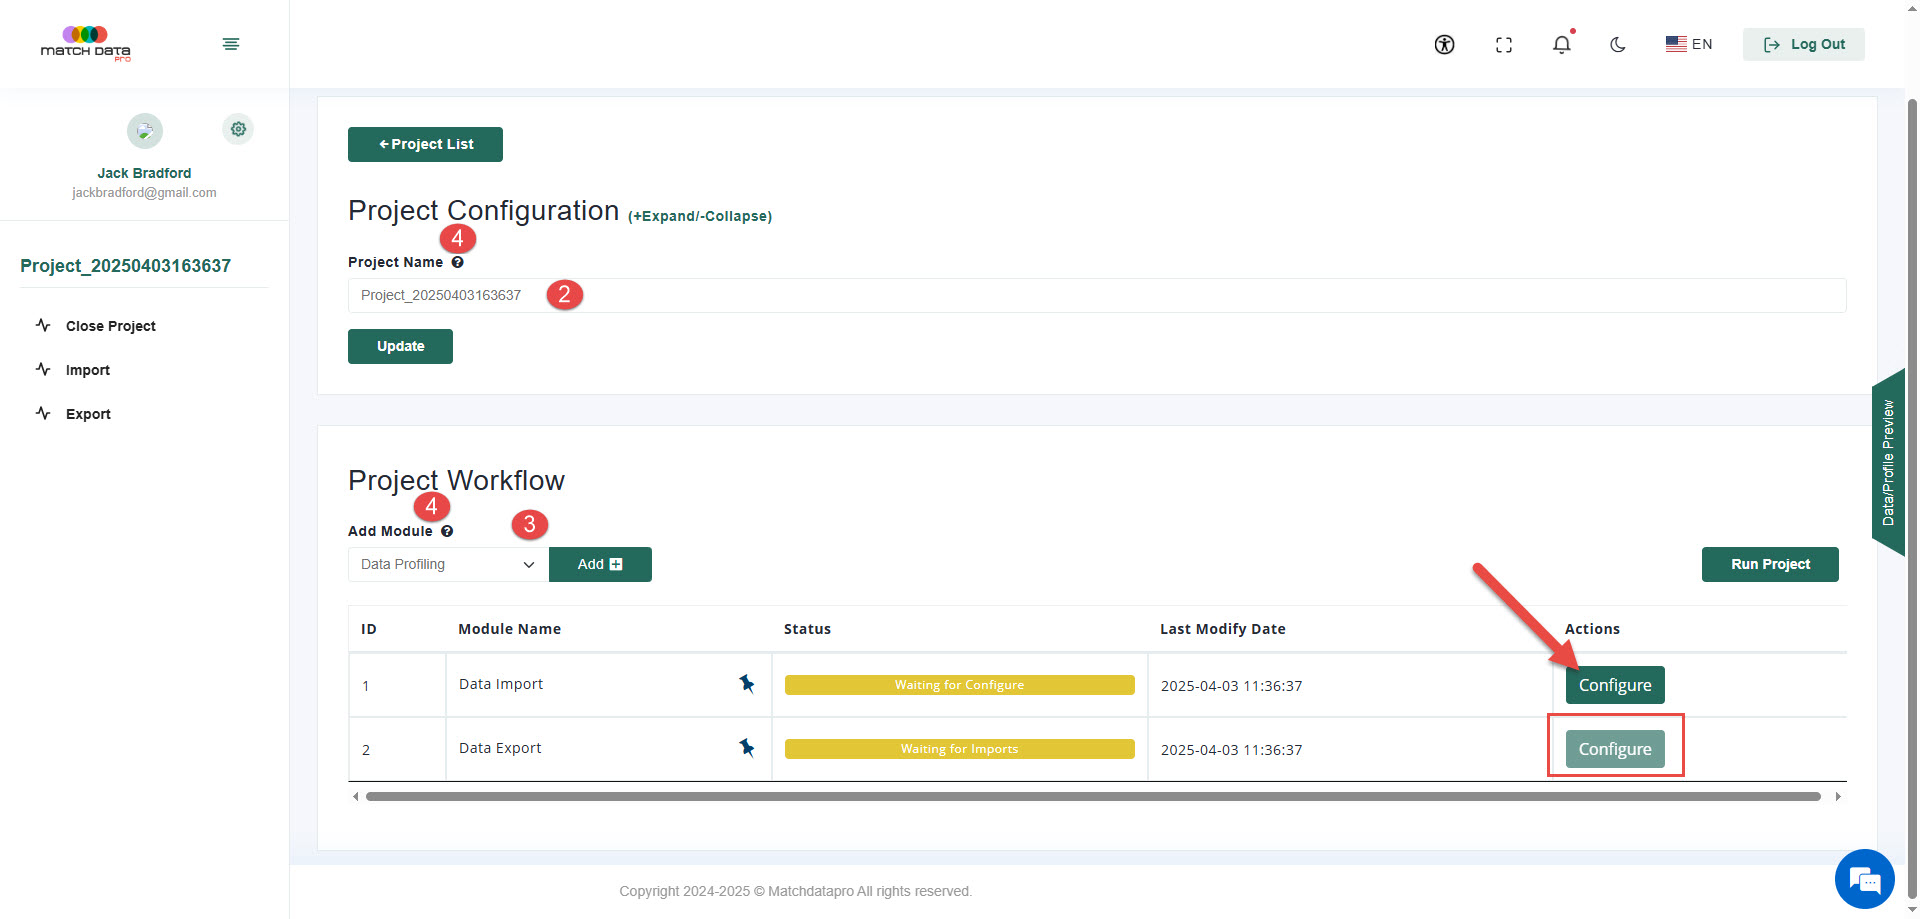
Enter a project name that clearly identifies this project.
-
Select the modules you’d like to include in your project. These may include:
-
- Import
- Profiling
- Cleansing
- Matching
- Senzing (if enabled)
-
Hover over the ? icon next to each module to see a tooltip with a short explanation. (Almost all fields in MDP have tooltips)
📝 You can reorder or remove modules as needed, this is especially helpful if your plan includes automation.
⚙️ Advanced Project Options
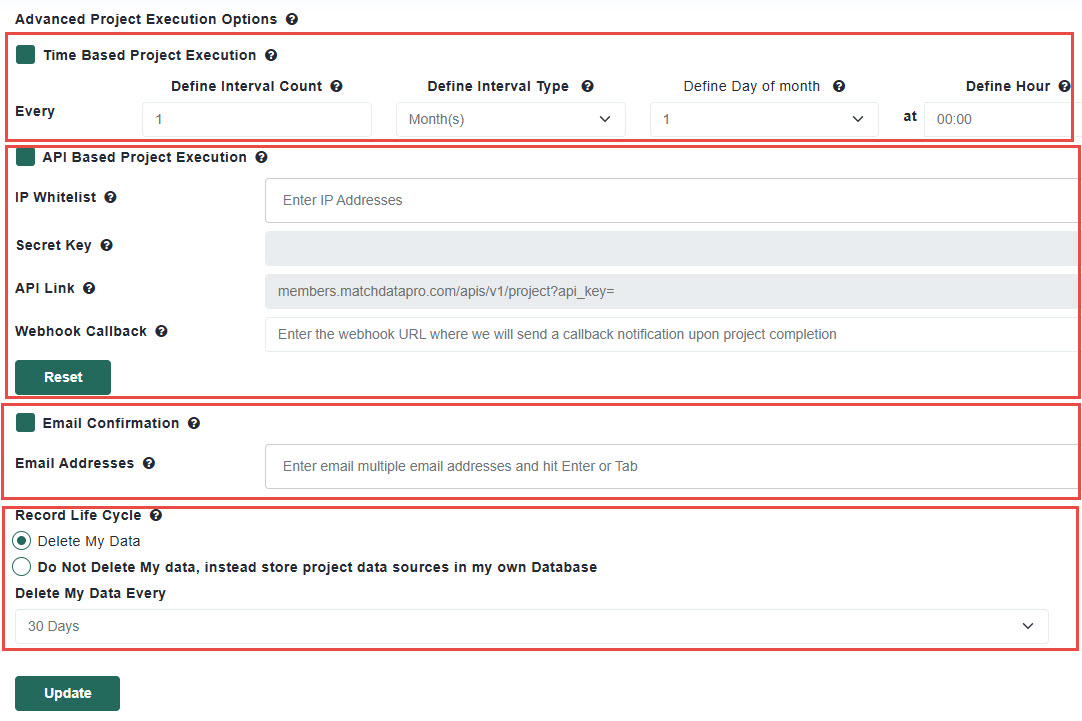
If your subscription includes automation, you can configure additional features during project setup:
🔁 Schedule Automation
-
Set your project to run daily, weekly, or monthly.
-
Ideal for recurring data tasks or continuous integration workflows.
🔗 API Trigger
-
Run your project programmatically by calling an API endpoint.
-
Enter the IP address of the machine authorized to trigger the process.
📡 Webhook Callback
-
Define a webhook URL to receive a callback once the project finishes.
-
Useful for logging, notifications, or chaining actions in external systems.
📧 Email Notifications
-
Enable email alerts to receive success/failure notifications.
-
Works with all three trigger methods: Run button, API call, or scheduled job.
🏁 Finalizing Your Project
Once you have configured the following:
- Configured any settings you require.
- Added any modules that you will want to work with.
- You can also add later if you wish.
🚀 You’re now ready to begin importing data and applying your data workflow!
FAQ
A project is a container for your data sources and all the modules you want to apply, including profiling, cleansing, matching, and more. Each project is fully configurable with its own automation and storage options.
Steps: Go to the Projects tab in the left-hand menu. Click Add New Project. Enter a project name. Select one or more modules (Import is always required).
Yes! On the Project List page: Click anywhere on the project row to open it. Use the Edit, Run, or Delete buttons on the right. Be cautious: deleting a project will remove all associated data.
The Import module is always included in a project. You must import at least one data source before other modules (such as profiling, cleansing, or matching) can be used.
If your plan includes automation, you can: Schedule the project to run automatically (daily, weekly, or monthly). Trigger the project via a secure API call by whitelisting an IP address. Receive a webhook callback or email notification after a run completes.
Yes. By default, data is deleted after a period of inactivity. You can override this by specifying your own database during project setup under Data Lifecycle Settings.
Every module and field includes a tooltip for quick reference. You can also: Visit this documentation page anytime Contact support through the live chat in your dashboard


